How I created my own GPS tracking device for motorcycle trips

This text has been machine translated. For the original article click the link below.
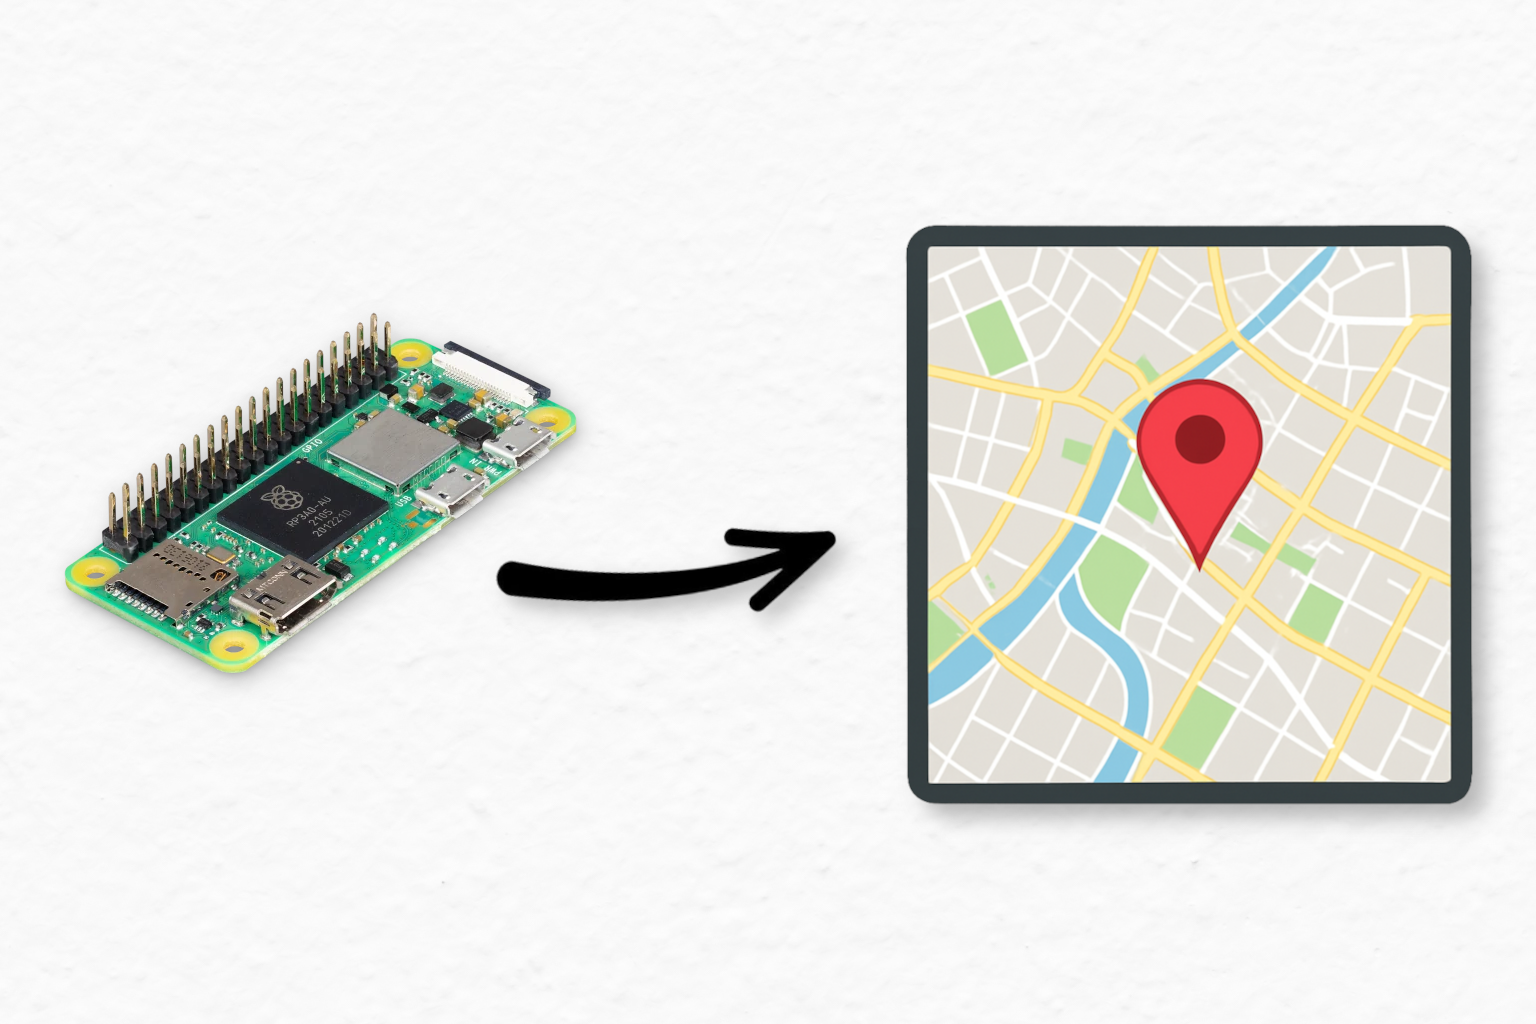
This project started because I wanted to record my motorcycle rides. I like to go on trips or just ride around and I thought it would be cool to visualize the routes and get some stats to go with it. So I started using the Geo Tracker app on my phone. It turns out it drains the phone quickly, so I figured why not make my own app, I can do that and make an interesting project.
How it works
The picture below describes the principle of the whole application, which is divided into three parts:
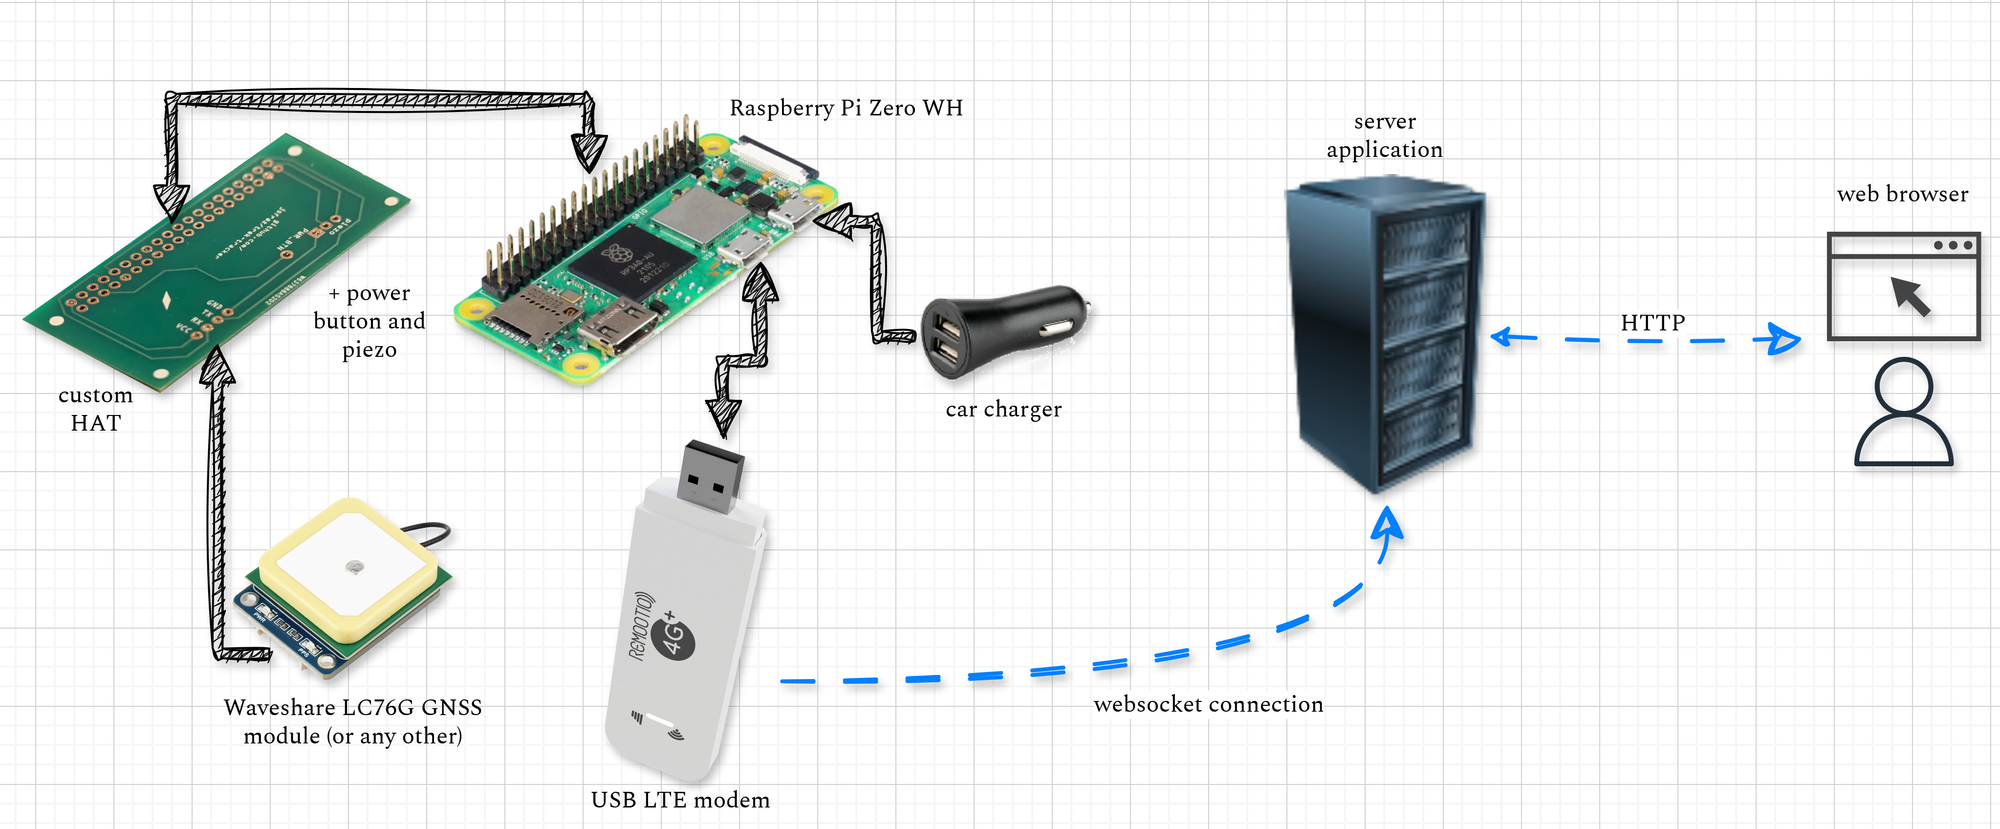
The tracking device itself (tracker)
GitHub: https://github.com/jsfraz/trek-tracker
The difference between GPS and GNSS
- GPS (Global Positioning System) - a satellite navigation system owned by the United States and operated by the United States Space Force
- GNSS (Global Navigation Satellite System) - service enabling autonomous spatial positioning using satellites with worldwide coverage (American GPS, Russian GLONASS, European Galileo etc.)
The device consists of a Raspberry Pi Zero WH, a Waveshare LC76G GNSS module (for location data acquisition), a USB LTE modem for internet access (SIM card required), a custom HAT PCB (to connect the Raspberry Pi GPIO header, designed using the Fritzing app and made in China) and a car charger. Other components are an off/on button, a piezo for error indication, a 2x20 pin hollow rail to connect the HAT to the Raspberry Pi header, a short USB-A male to Micro USB male cable (to connect the charger), a short USB-A female to Micro USB male cable (to connect the LTE modem), a two-line cable from the charger, and two eyelet connectors to connect to the motorcycle battery.
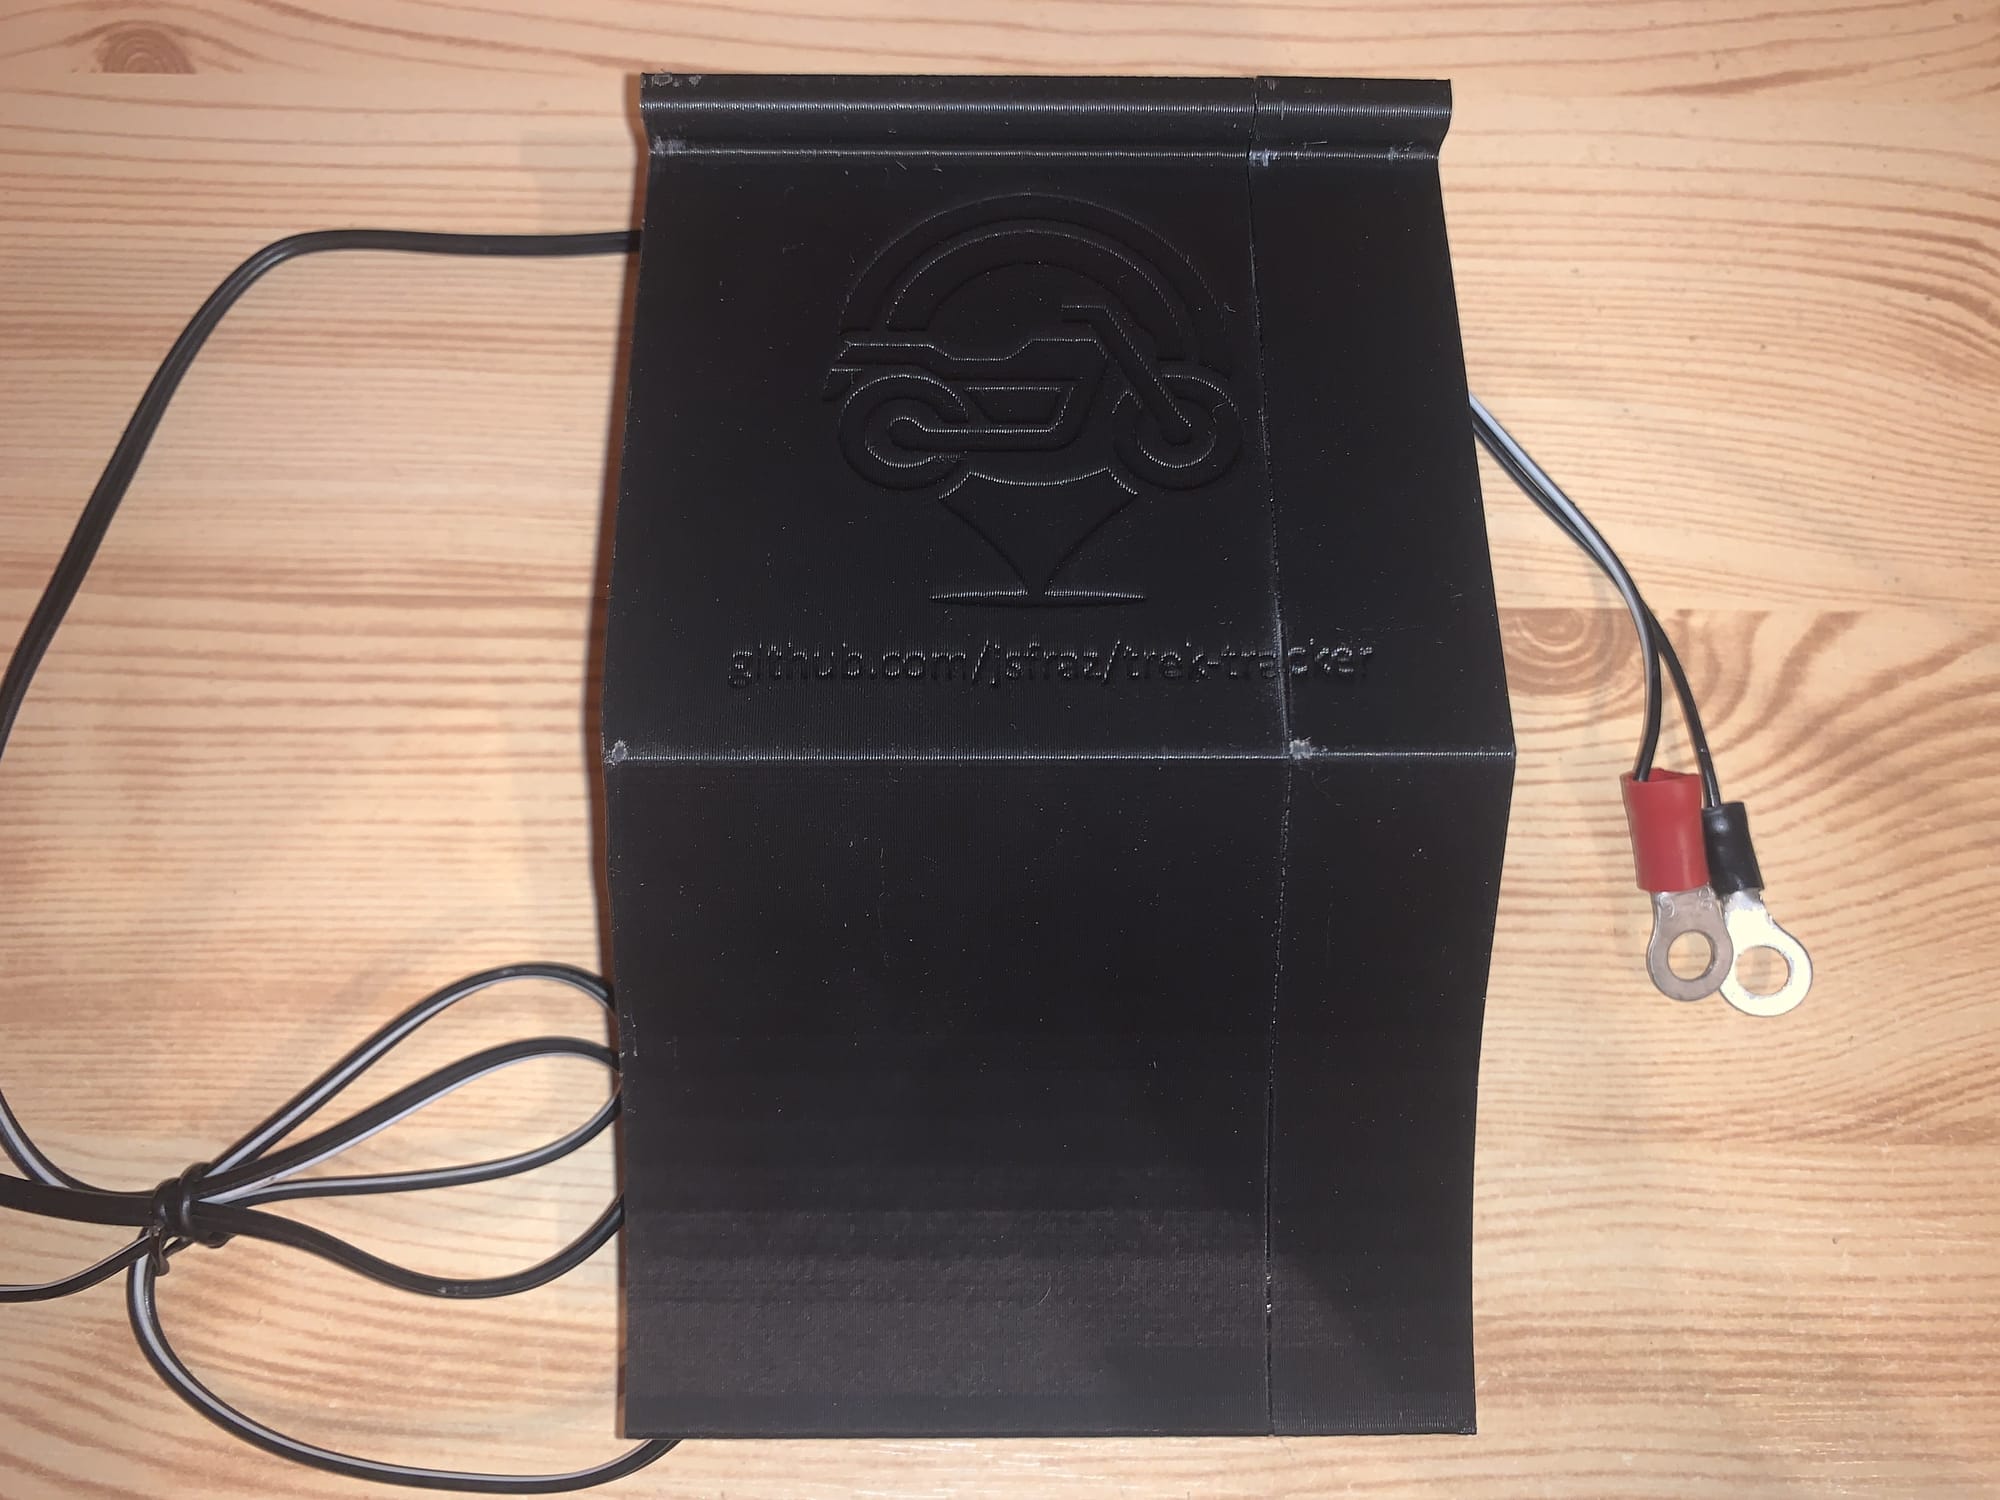
Equally important is the box (a friend helped me model it), which can be printed on a 3D printer. The model can also be found on GitHub.
The principle of the device is that the Raspberry Pi runs a Python script as a service, which every second (whenever the GNSS module sends data via the serial port) sends the acquired data from the satellites about the current position, speed and time via websocket (a two-way communication tunnel via HTTP protocol, I use the Socket.IO library) to the server, where it is stored in a database. This allows the current location to be displayed in the web application and its history to be viewed.
Here is an example of the main loop of the program that sends data to the server:
Main loop of the program
After assembling the whole device, it looks something like this (and no, it's not a bomb):
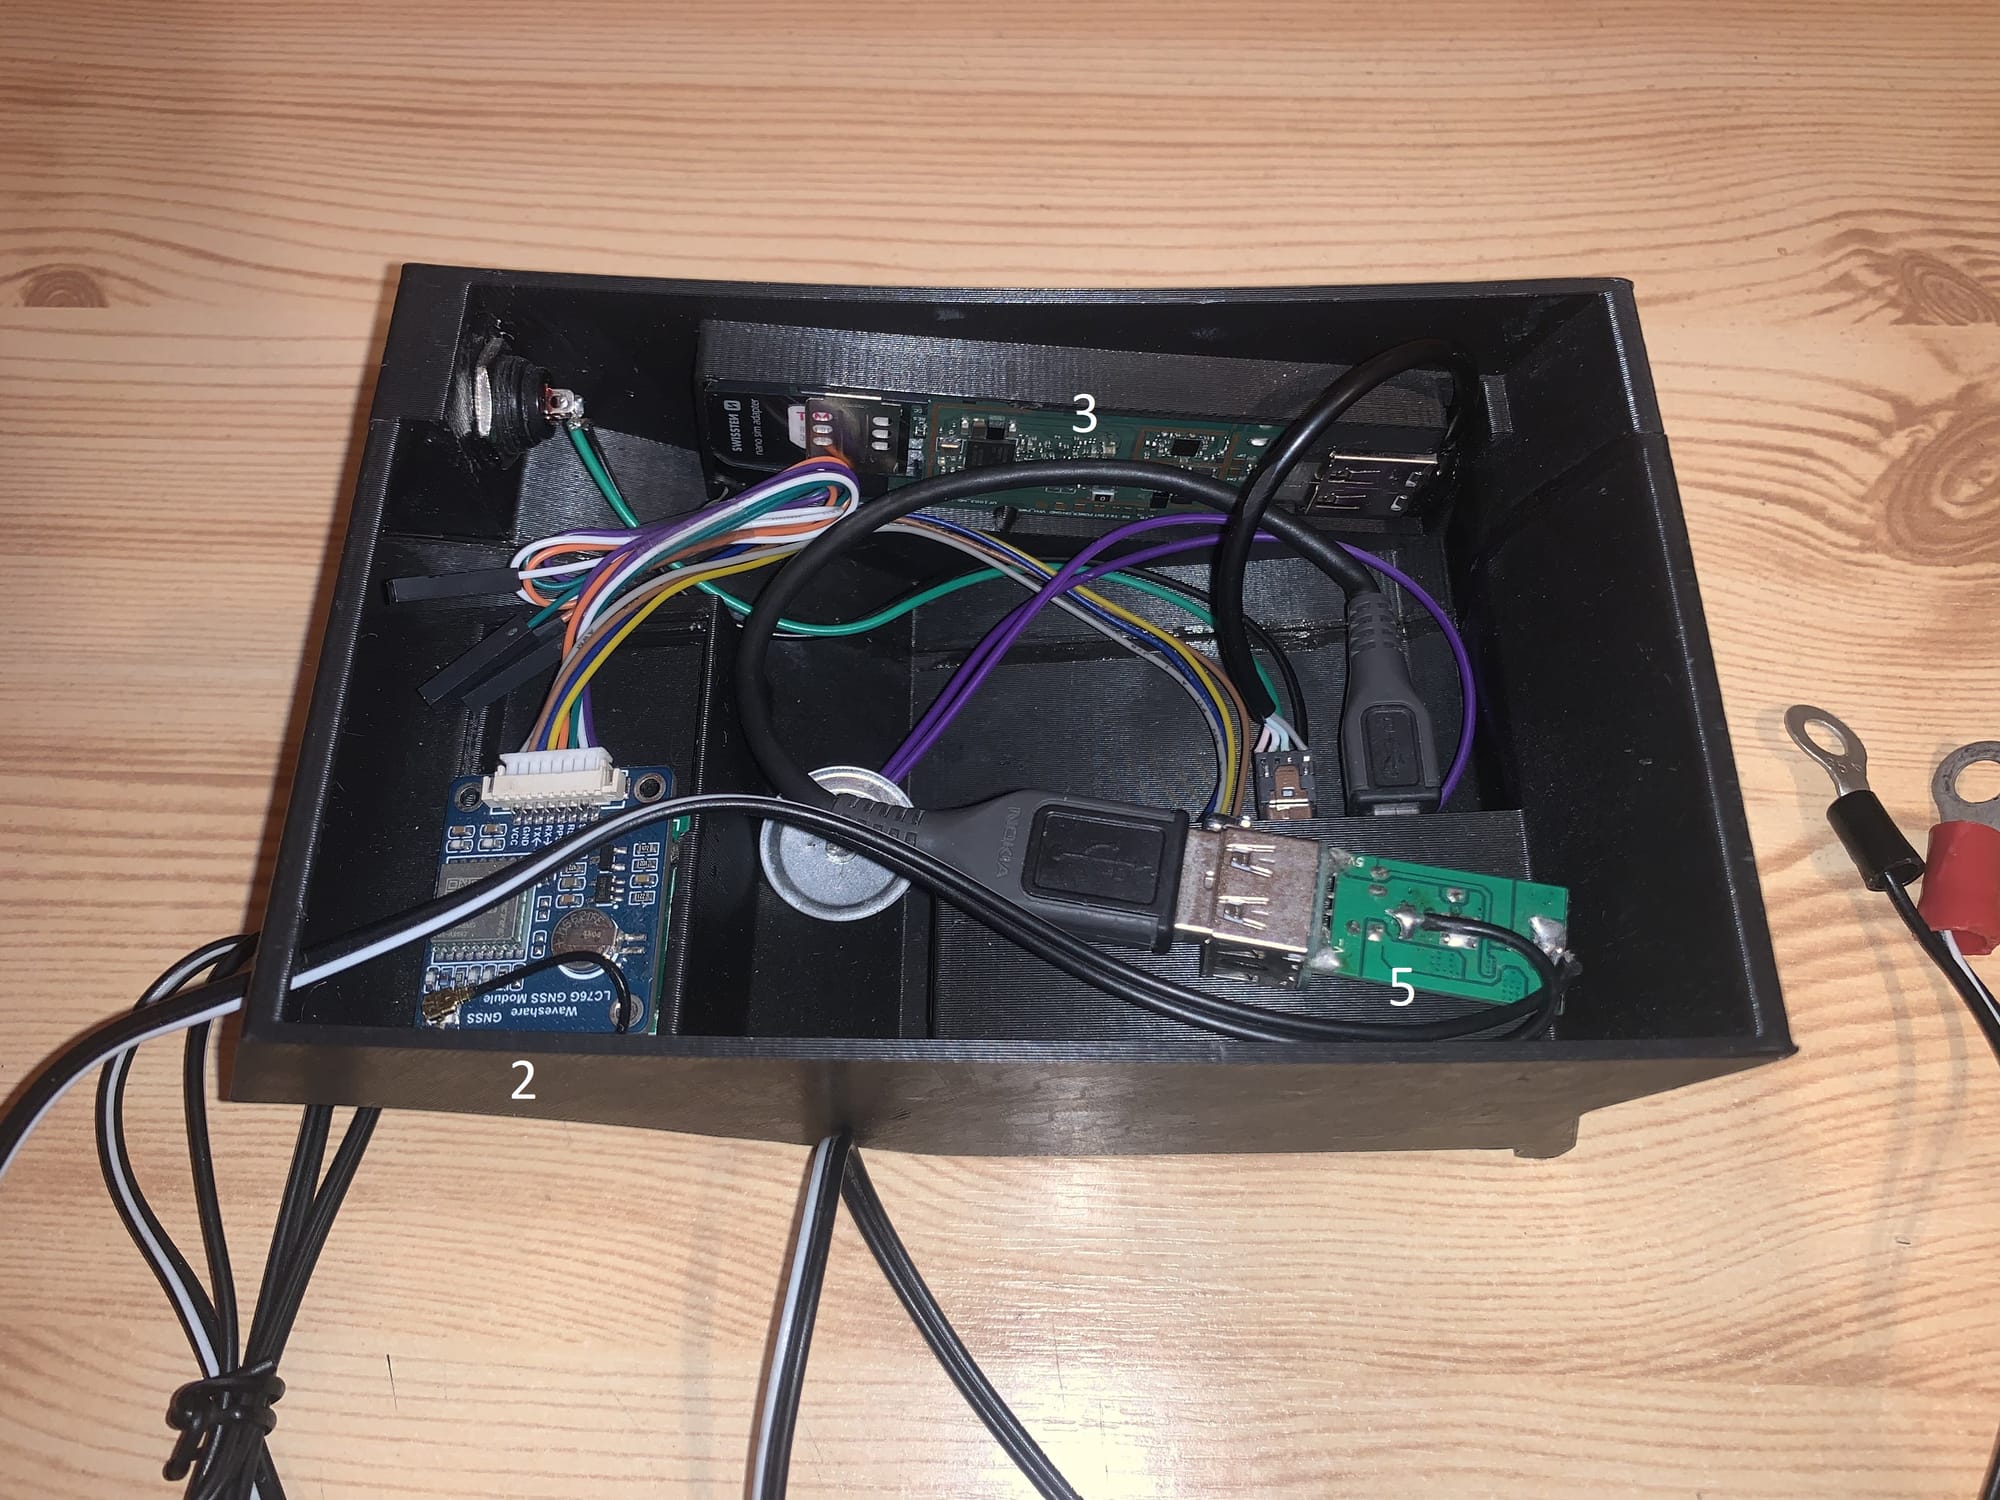

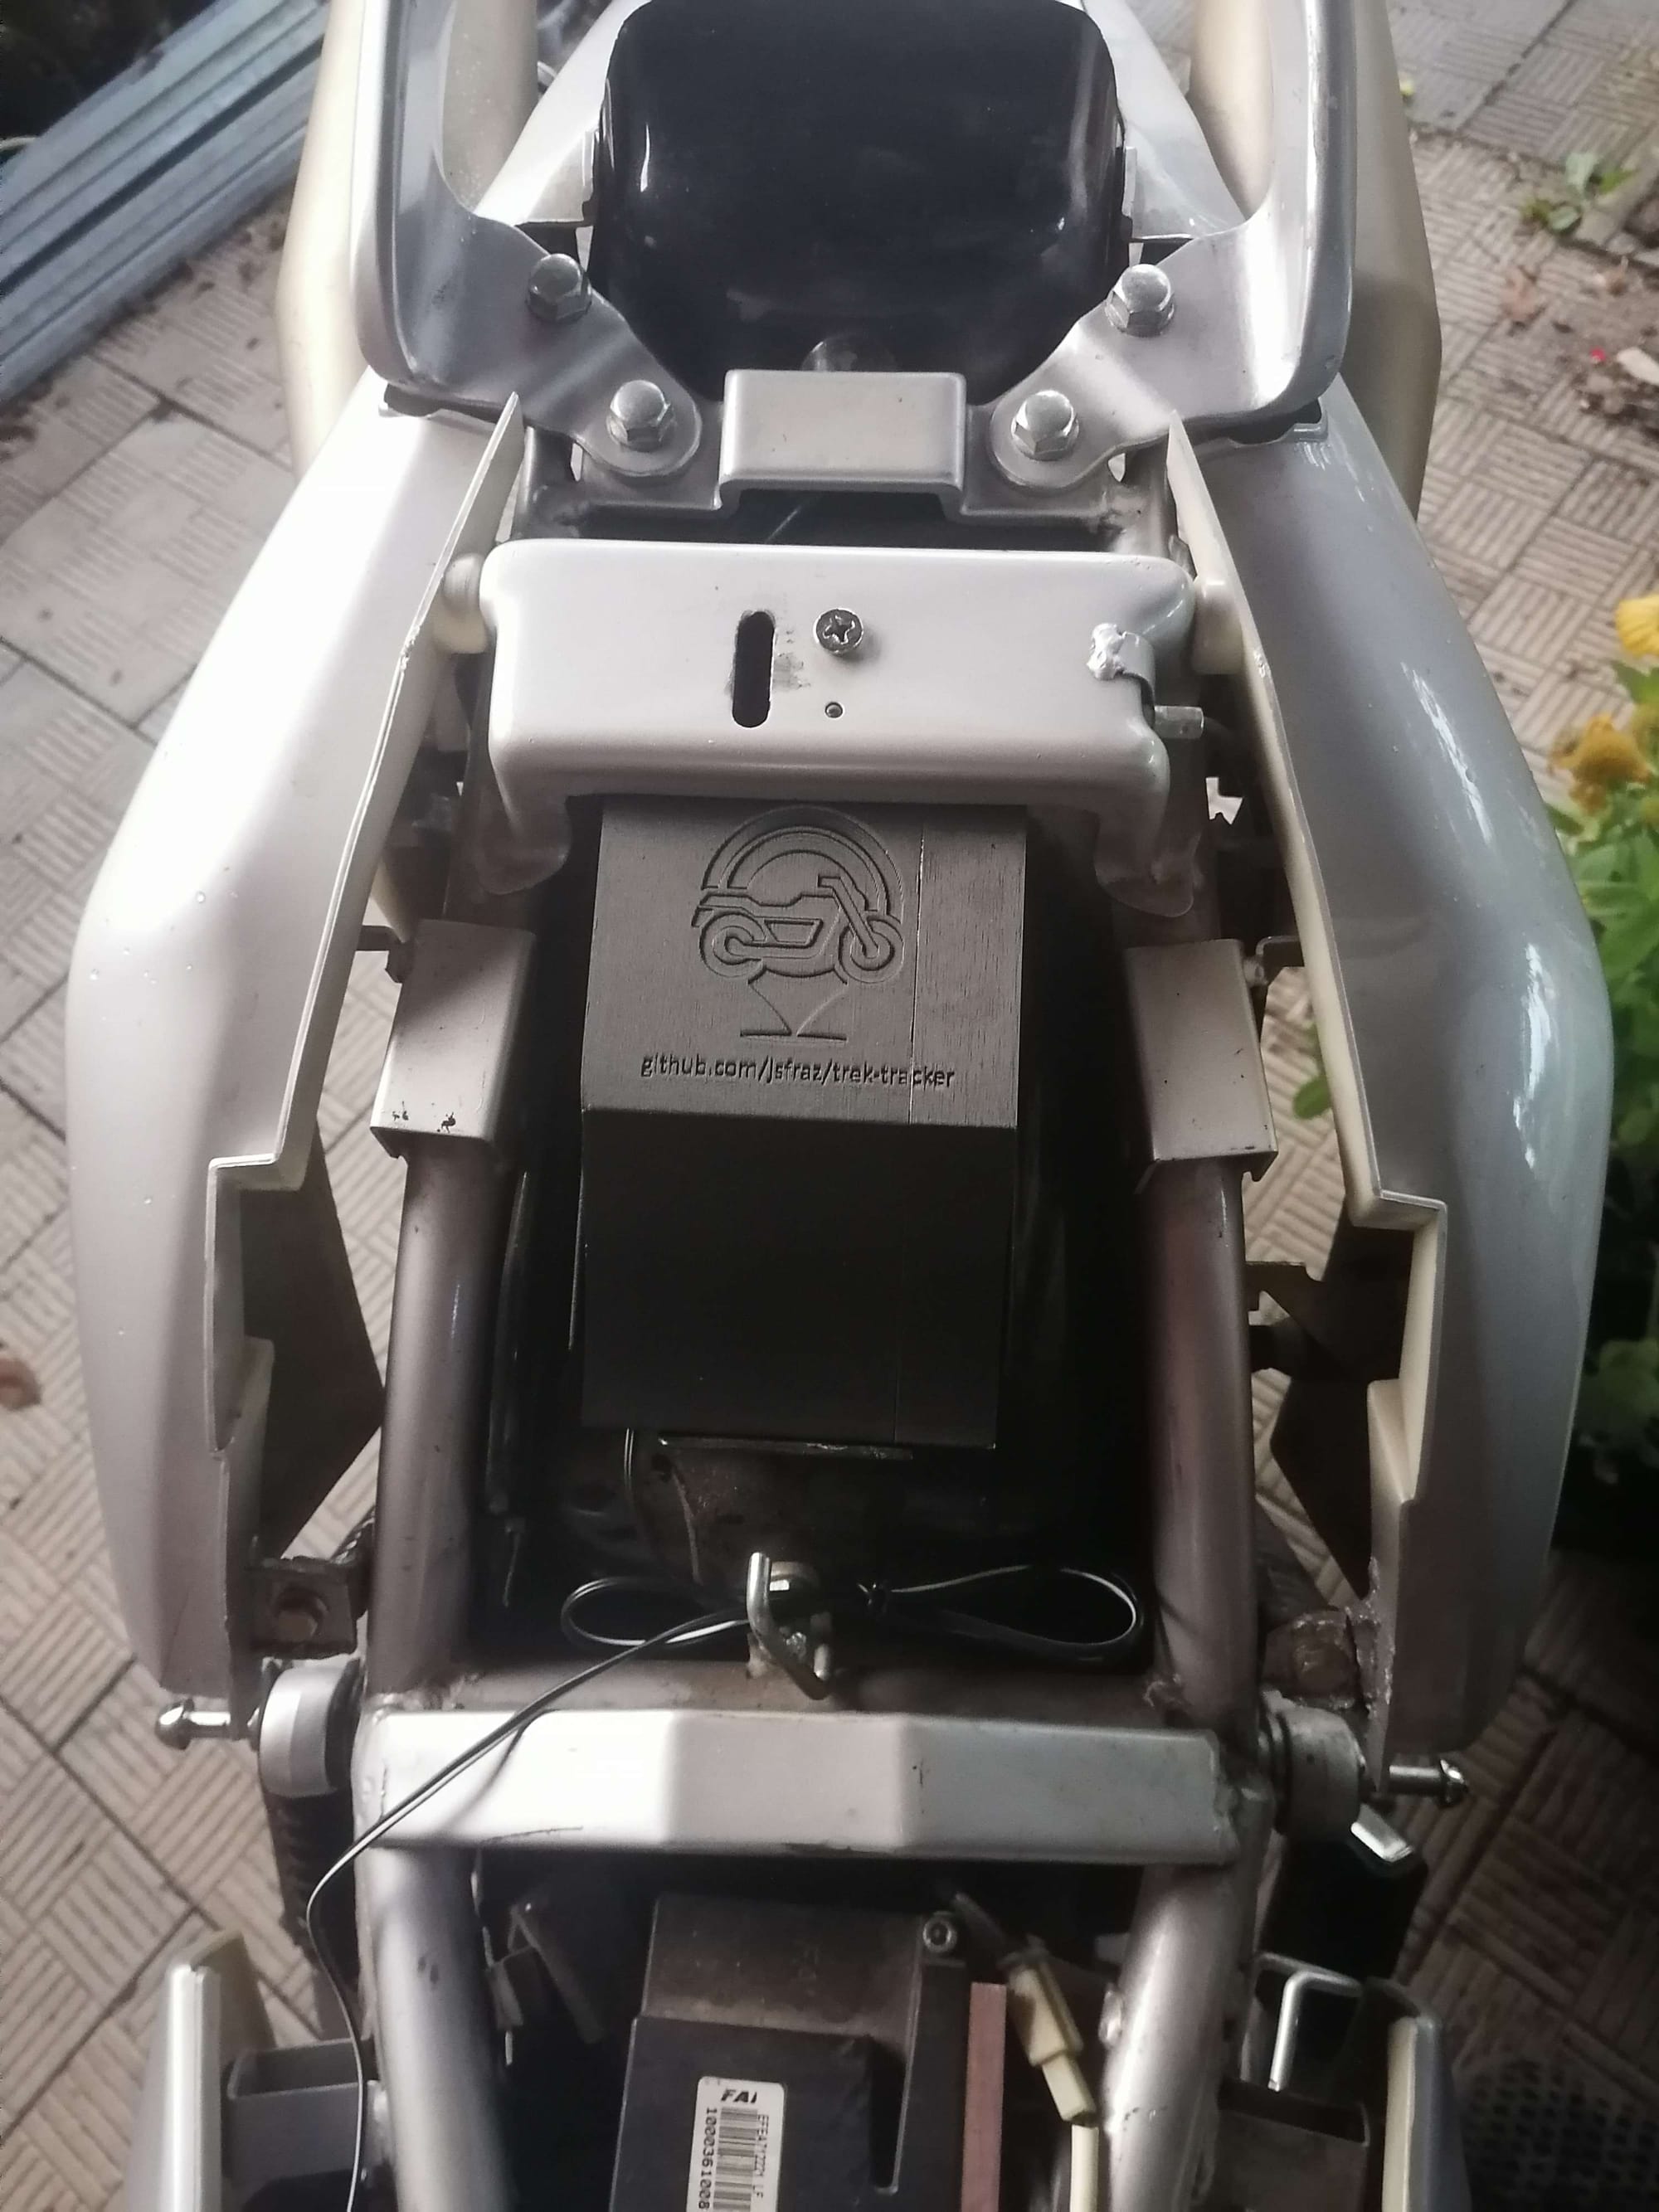
Example of assembled GPS tracker, box inserted under the seat
- 1 Raspberry Pi
- 2 GNSS module
- 3 USB LTE modem
- 4 custom HAT
- 5 car charger
I filled the empty space in the box with bubble wrap.
Server application (server)
GitHub: https://github.com/jsfraz/trek-server
You need a public IP address to host the server part of the project!
The application running on the VPS server communicates with the database and issues HTTP API endpoints to the client application.
Web application (client)
GitHub: https://github.com/jsfraz/trek-client
To host a web application you need to own a domain!
Web application for user interaction with the system - display of location over time or over the whole period, live tracking of location, statistics on speed and distance travelled.
Web interface example
Installation
The installation procedure is described on the GitHub Wiki of each project. First the server part needs to be installed and configured, then the web part, which the user logs into with the default admin user credentials defined when installing the server. Once logged in, the user adds a new device in the admin area and thus receives an API key to use when configuring the device once installation is complete.
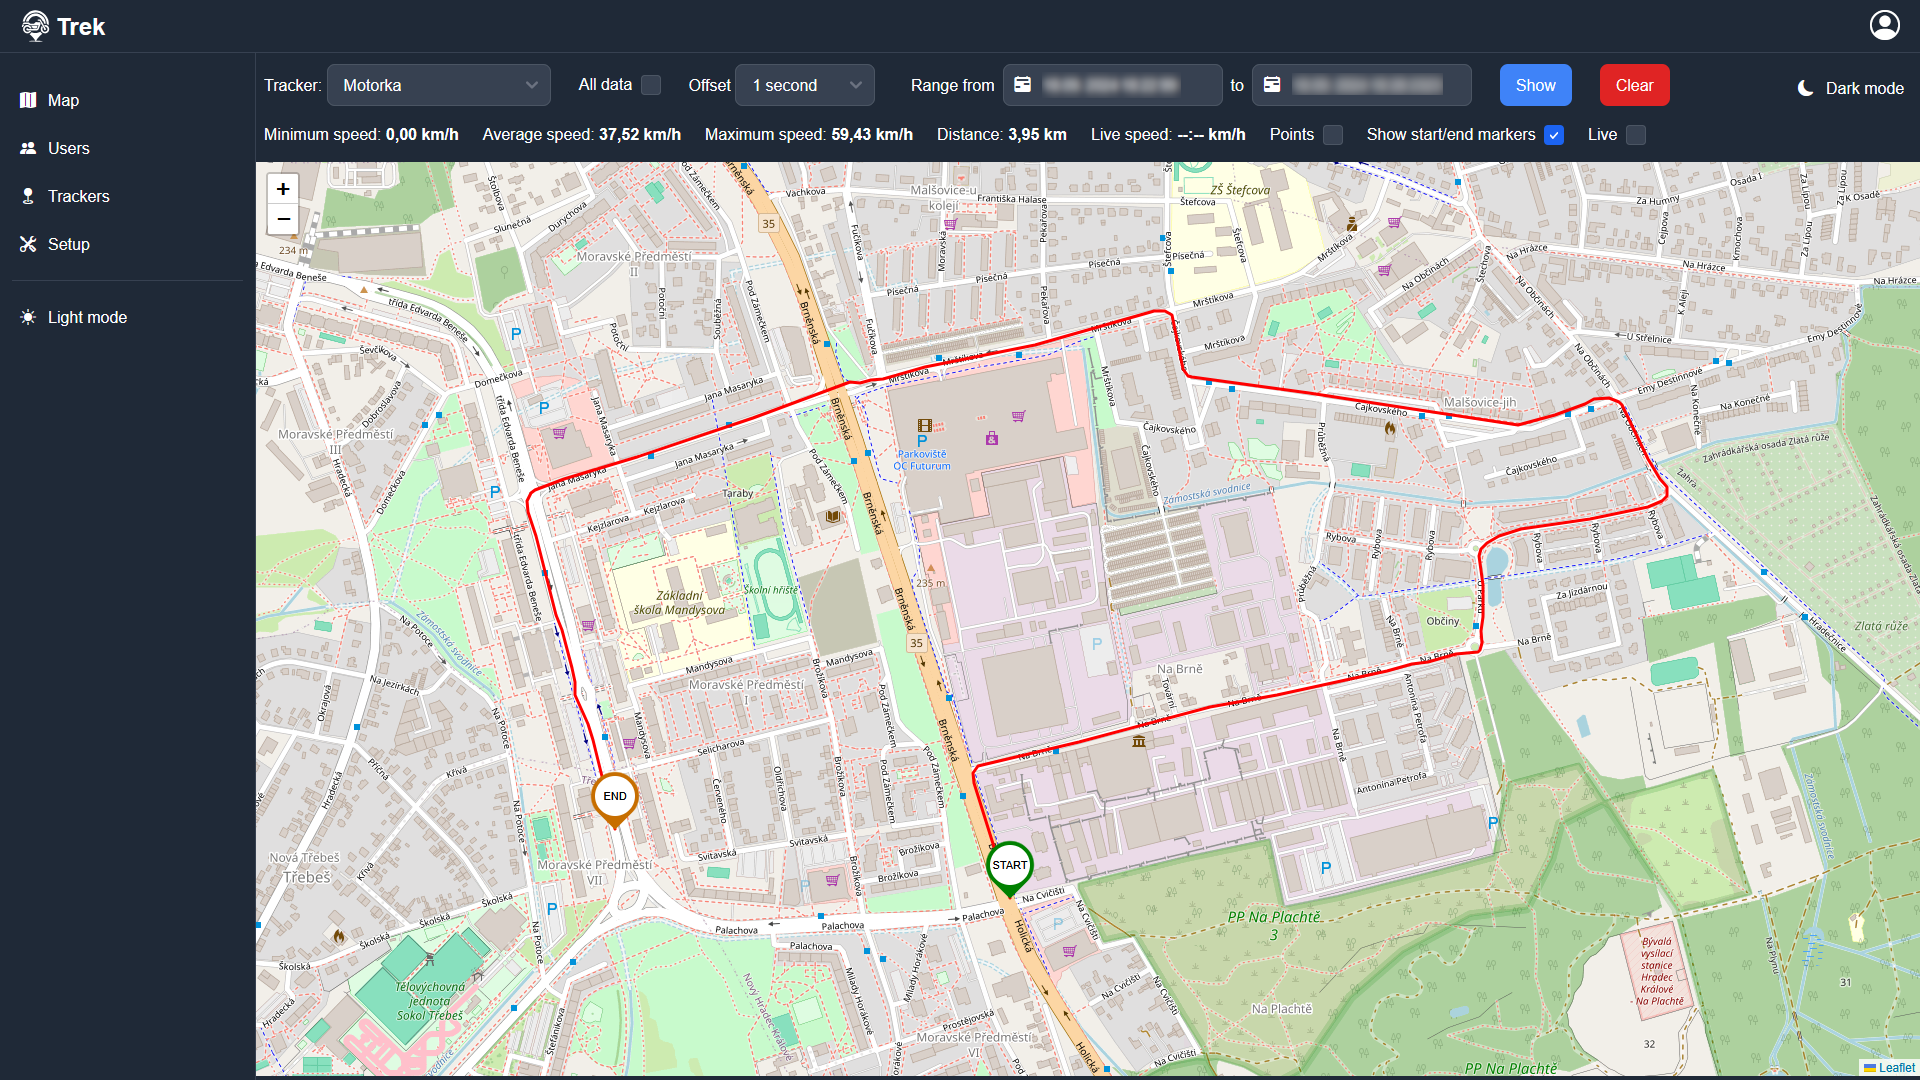
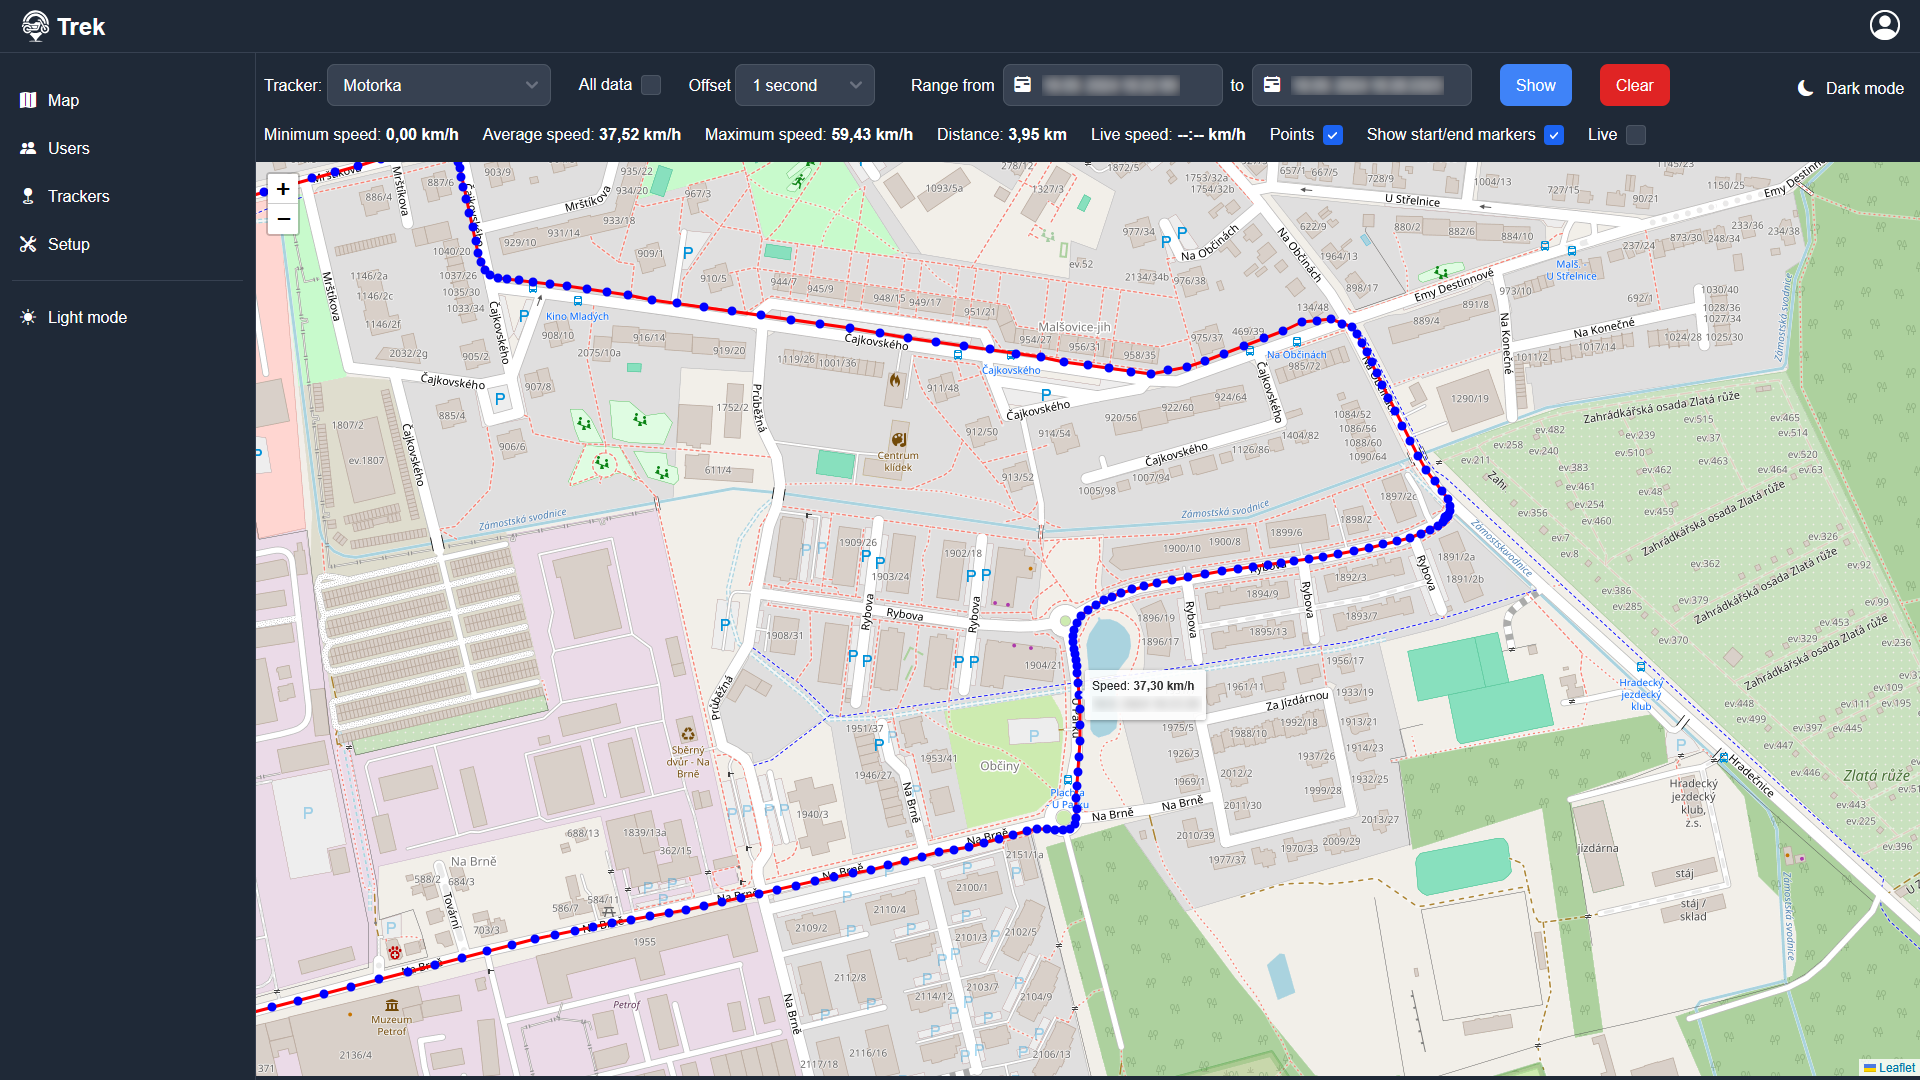
The test in practice
I decided to try the tracker in the city first (pictures above). I am satisfied with the result. On the map you can see the individual points second by second with speed and time. The only drawback is that the recorded position is not 100% accurate - sometimes the map shows as if I am driving on the pavement, but the fact that the position is not accurate to the millimeter is to be expected.
A bigger problem arose when I decided to record a route from Dolní Morava via Poland to Hradec Králové and in some places there was insufficient operator coverage:
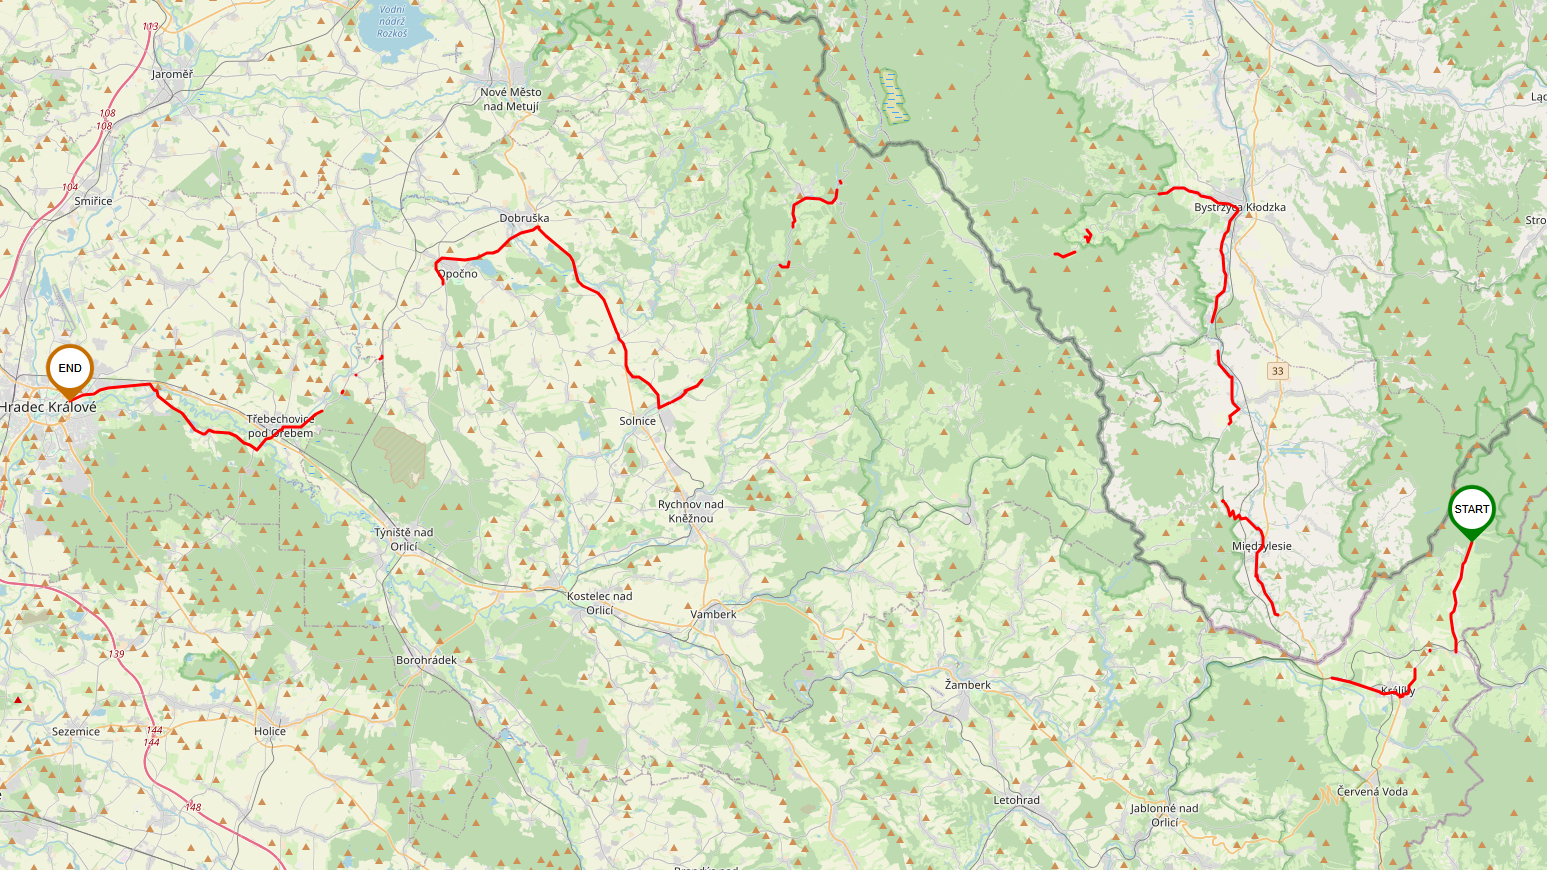
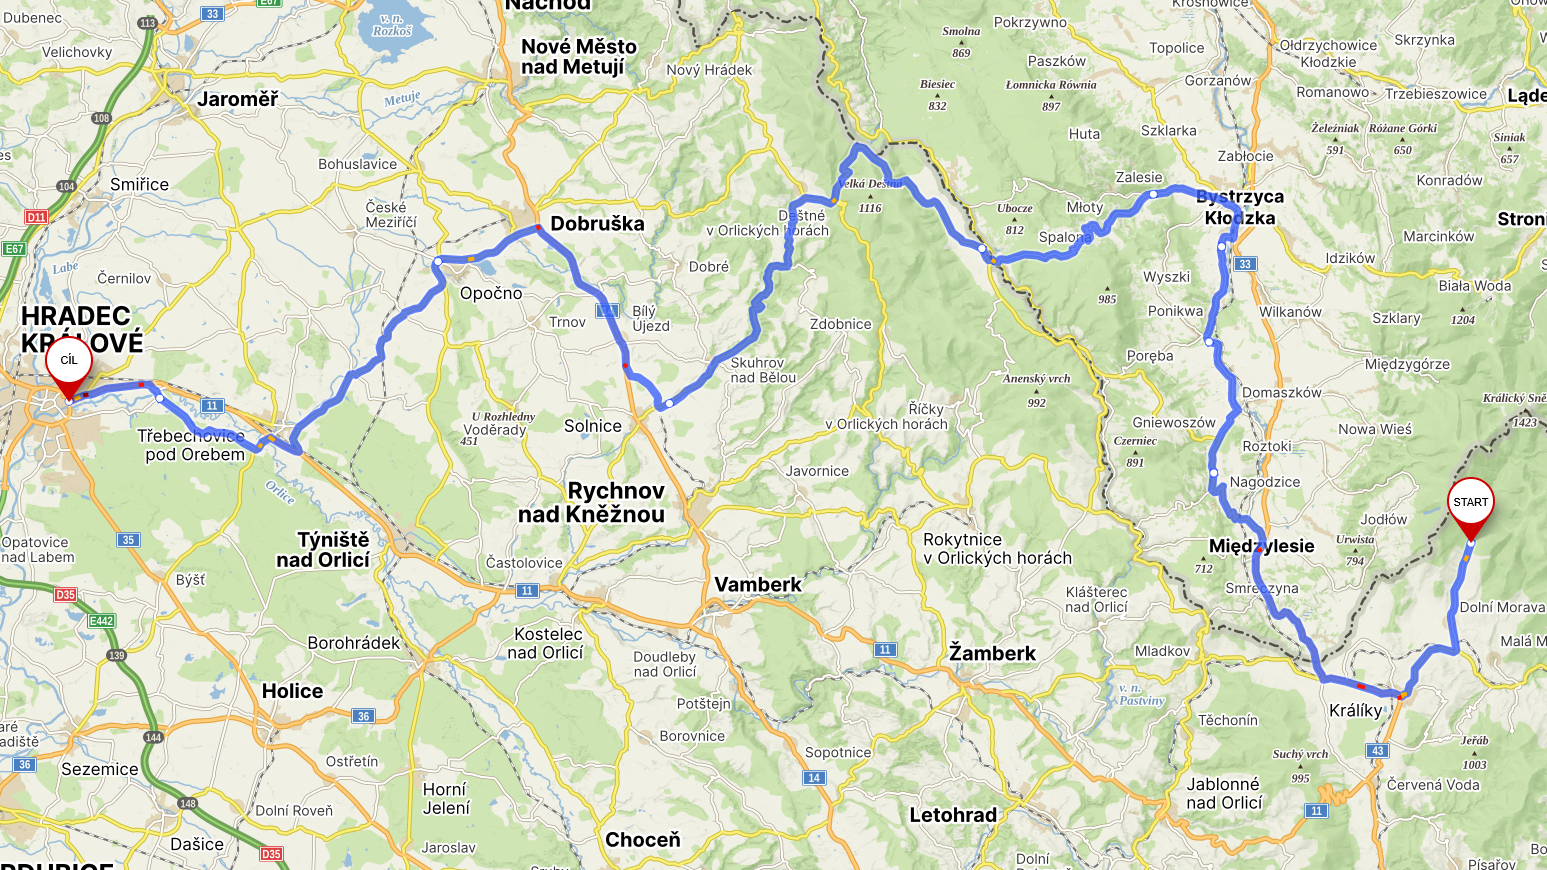
Comparison of recorded positions VS planned route
Use the slider to compare the recording with the planned route:
The problem is that in order to send the data to the server, you need an internet connection, which in remote areas or at borders is missing or weak. Another requirement is a GNSS signal, but if the module has a view of the sky, that shouldn't be a problem. The internet connection problem can be solved by storing the data in memory until the internet is available again and the missing data can be sent to the server.
Conclusion
I think the first version works pretty well, server, web and tracker. The only problem is the state where the internet is not available for the tracker. I'm going to fix that in the next version. I may not have chosen the most ideal or smallest hardware, because the Raspberry Pi has an operating system like any other computer, which is an extra layer of complication. I could have used a different data transfer protocol, such as MQTT, which is widely used in IoT. Despite this first experimental version having some bugs, I think it's good enough and has fulfilled the purpose of a simple hobby project.